Today, I did some experiments with the Raspberry Pi and C#. I will note my learnings here! In this tutorial, you will learn how to install C# on the Raspberry Pi and how to write a simple program that blinks an LED.
Install Mono
In order to run .NET applications on the Raspbermeinerry Pi, we need to install Mono.
First, we need to update the Pi and make sure that the most important packages are installed:
sudo apt-get update
sudo apt-get install libunwind8 libssl-dev unzip
Now, we can install Mono. We could use the version that is part of the Raspbian repo, but in order to install the latest version and to avoid time consuming compiling, we grab it from here:
sudo apt-key adv --keyserver keyserver.ubuntu.com --recv-keys 3FA7E0328081BFF6A14DA29AA6A19B38D3D831EF
echo "deb http://download.mono-project.com/repo/debian wheezy main" | sudo tee /etc/apt/sources.list.d/mono-xamarin.list
sudo apt-get update
sudo apt-get install mono-complete
We want to write our project in a folder called gpio_csharp. So let’s create that folder:
mkdir gpio_csharp
Next, we need to get a .NET library that supports the GPIO pins of the Raspberry Pi. There are many available, but we will use this one and get the library ready for our project:
git clone git://github.com/cypherkey/RaspberryPi.Net.git
cd RaspberryPi.Net/RaspberryPiDotNet
xbuild RaspberryPiDotNet.csproj
cp bin/Debug/RaspberryPiDotNet.dll /home/pi/gpio_csharp/
More information: https://github.com/raspberry-sharp/raspberry-sharp-io
The RaspberryPi.Net project needs the bcm2835 C library. We compile it and prepare it for our project. I use Version 1.50:
wget http://www.airspayce.com/mikem/bcm2835/bcm2835-1.50.tar.gz
tar -zxf bcm2835-1.50.tar.gz
cd bcm2835-1.50
./configure
make
sudo make check
sudo make install
cd src
cc -shared bcm2835.o -o libbcm2835.so
cp libbcm2835.so /home/pi/gpio_csharp/
Blink an LED
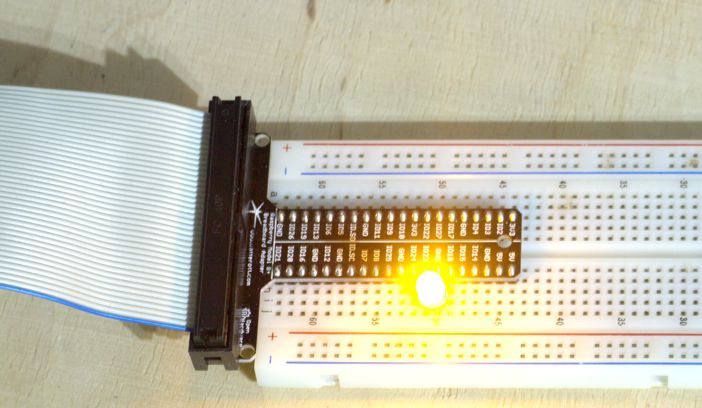
Connect an LED between pin GPIO18 and GND. Use your favorite text editor on the Pi and create a file called HelloPi.cs in the gpio_csharp folder:
using System;
using System.Collections.Generic;
using System.Linq;
using System.Text;
using System.Threading.Tasks;
using RaspberryPiDotNet;

namespace HelloPi
{
    class Program
    {
        static void Main(string[] args)
        {
            Console.WriteLine("Blinking LED GPIO18!");
            GPIOMem led = new GPIOMem(GPIOPins.V2_GPIO_18);
            while (true)
            {
                led.Write(PinState.High);
                System.Threading.Thread.Sleep(1000);
                led.Write(PinState.Low);
                System.Threading.Thread.Sleep(1000);

            }
        }
    }
}
We need to compile this file and run it with super user power:
mcs HelloPi.cs -r:RaspberryPiDotNet.dll
sudo mono --runtime=v4.0 HelloPi.exe
You could have also used Visual Studio 2015 on Windows 10 for writing this code and compiling it. I will show a nice trick that makes it even easier in the next tutorial.